As promised in my previous blog, I am going to explain how to create your own custom action for Nintex Workflow.
(New Post Nintex Custom Action – Error Handling)
(Update: I have got this working in a 2013 SharePoint On Premise project, the C# code will indicate that some methods are deprecated now, but this is OK as Nintex Workflow still runs using the SharePoint 2010 Workflow engine, not the new 2013).
Nintex is a great product to create Workflows with within SharePoint. Much more flexible than SharePoint Designer, and far less complicated than using Visual Studio. There is an extensive list of Actions already for Nintex Workflow sometimes you need a Custom Action that is specific for your business such as bring back data from your bespoke application, or UNIX text file. This blog will explain the different parts of creating a custom action to you.

Above picture showing you collection of Actions that comes with Nintex Workflow.
To build a custom action, unfortunately, there is a collection of files you are require to create, even though there is only one real section that performs the actual business logic. The rest of it is all supporting code. Below is a basic project setup of all the files you need. I will explain each section throughout this post. With a walkthrough at the end of how to create a ReadFromPropertyBag Custom Action.

References
Before we can even start we require the following References.
For SharePoint 2013, you will need to get the Nintex dll’s from the GAC. To do this you will need to browse to c:\Windows\Microsoft.NET\assembly\GAC_MSIL\ and find the Nintex DLL’s there.
Features
A WebApplication feature that when activated it will add the Custom Action to the Web Application and authorize it to be used within the web application.
CustomActions –ActionName – NWAFile
An element file, which holds an XML file which is all the required details for a NintexWorkflowActivity. It is this file that is read in by the Feature receiver to be able to add the custom action to the web application.
CustomActions – ActionName – ActionNameActivity
A class that is inherited by Nintex.Workflow.Activities.ProgressTrackingActivity. This file contains all the Dependency properties to the activity. The Dependency Properties are object properties that can be bound to other elements of a workflow, such as workflow variables or dependency properties of other activities. They are used to store the data that the activity will require or to output data from the activity. This is also the file that contains the execution of the actual business logic.
CustomActions – ActionName – ActionNameAdapter
A class that is inherited by Nintex.Workflow.Activities.Adapters.GenericRenderingAction. You will need to implement the abstract class of GenericRenderingAction. These implementations
- GetDefaultConfig() – define the parameters that the user can configure for this action and sets the default label for the action.
- ValidateConfig() – Adds logic to validate the configuration here, and will display any error messages to the user if there is an issue.
- AddActivityToWorkflow() – Creates an instance of the Activity and set its properties based on config. Then it adds it to the parent activity.
- GetConfig() – Reads the property from the context.Activity and update the values in the NWActionConfig.
- BuildSummary() – Constructs an Action Summary class to display details about this action.
I find the Adapter is very similar for every Action. Once you have the basic of one, just by adding an extra parameter or removing one you can quickly put an adapter together for any Custom Action.
Layouts – NintexWorkflow – CustomActions – ActionName – Images
I have two icon .png files in here. One is sized at 49×49 pixels and the other at 30×30 pixels. These files are referenced in the NWAFile, and used to display the custom action to the user in the toolbox area (30×30), or in the actual workflow itself (49×49).
You could add a third one here for Warning Icon. This is where the custom action isn’t configured. This would be a 49×49 pixel too.
Layouts – NintexWorkflow – CustomActions – ActionName – ActionNameDialog
An application page inherited from Nintex.Workflow.ServerControls.NintexLayoutBase. The dialog is what appears to the user when they have to configure the custom action through the browser. Here there is no code behind. You mainly display the controls in the aspx and set up two javascript functions to read in and read out the configuration on load and save.
Walkthrough creating ReadFromPropertyBag Custom Action.
Now that you understand the basic roles of all the files required to make one custom action I will walk through creating a custom action that will read from the current SPWeb property bag. The user will pass in the “Property name” to obtain the value.
If you create a Solution with the similar layout my solution layout above, replacing “ActionName” with ReadFromPropertyBag. Your solution and file layouts should look similar to below.

ReadFromPropertyBagActivity.cs
Starting with the ReadFromPropertyBagActivity file. This inherits Nintex.Workflow.Activities.ProgressTrackingActivity. We will first add all the public static DependencyProperties. The default ones are __ListItem, __Context and __ListId. Then we will add 2 of our own, One to hold the the Property Name and the ResultOuput. You can delete the designer.cs file.
Each DependencyProperty will have its own public property.
using System;
using System.Workflow.ComponentModel;
using Microsoft.SharePoint.Workflow;
using Microsoft.SharePoint.WorkflowActions;
using Nintex.Workflow;
using Microsoft.SharePoint;
namespace CFSP.CustomActions.ReadFromPropertyBag
{
    public class ReadFromPropertyBagActivity : Nintex.Workflow.Activities.ProgressTrackingActivity
    {
        public static DependencyProperty __ListItemProperty = DependencyProperty.Register("__ListItem", typeof (SPItemKey), typeof (ReadFromPropertyBagActivity));
        public static DependencyProperty __ContextProperty = DependencyProperty.Register("__Context", typeof (WorkflowContext), typeof (ReadFromPropertyBagActivity));

        public static DependencyProperty __ListIdProperty = DependencyProperty.Register("__ListId", typeof (string),typeof (ReadFromPropertyBagActivity));
        public static DependencyProperty PropertyProperty = DependencyProperty.Register("Property", typeof (string), typeof (ReadFromPropertyBagActivity));
        public static DependencyProperty ResultOutputProperty = DependencyProperty.Register("ResultOutput", typeof (string), typeof (ReadFromPropertyBagActivity));

        public WorkflowContext __Context
        {
            get { return (WorkflowContext) base.GetValue(__ContextProperty); }
            set { base.SetValue(__ContextProperty, value); }
        }

        public SPItemKey __ListItem
        {
            get { return (SPItemKey) base.GetValue(__ListItemProperty); }
            set { base.SetValue(__ListItemProperty, value); }
        }

        public string __ListId
        {
            get { return (string) base.GetValue(__ListIdProperty); }
            set { base.SetValue(__ListIdProperty, value);}
        }

        public string Property
        {
            get { return (string) base.GetValue(PropertyProperty); }
            set { base.SetValue(PropertyProperty, value);}
        }

        public string ResultOutput
        {
            get { return (string) base.GetValue(ResultOutputProperty); }
            set {base.SetValue(ResultOutputProperty, value);}
        }

        public ReadFromPropertyBagActivity()
        {
        }

       protected override ActivityExecutionStatus Execute(ActivityExecutionContext executionContext)
        {
        }
        protected override ActivityExecutionStatus HandleFault(ActivityExecutionContext executionContext, Exception exception)
        {
        }
    }
}
Now we will need to override the Execute() method. This is the main business logic of your Custom Action.
   protected override ActivityExecutionStatus Execute(ActivityExecutionContext executionContext)
        {
            //Standard Nintex code to obtain context.
            ActivityActivationReference.IsAllowed(this, __Context.Web);
            NWWorkflowContext ctx = NWWorkflowContext.GetContext(
               this.__Context,
               new Guid(this.__ListId),
               this.__ListItem.Id,
               this.WorkflowInstanceId,
               this);

            base.LogProgressStart(ctx);
            //Get the property value.
            string resolvedProperty = ctx.AddContextDataToString(this.Property);

            var result = "";

            //Using the context get the property if it exists.
            if (ctx.Web.AllProperties.ContainsKey(resolvedProperty))
            {
                result = ctx.Web.AllProperties[resolvedProperty].ToString();
            }
            //store the result.
            this.ResultOutput = result;

            //End Execution.
            base.LogProgressEnd(ctx, executionContext);
            return ActivityExecutionStatus.Closed;
       }
The last thing we need to do in this class is to handle if there is a fault during execution. Overwrite the HandleFault code with the following. You can make the error say whatever you like. I’m just referencing the item that called the workflow.
protected override ActivityExecutionStatus HandleFault(ActivityExecutionContext executionContext, Exception exception)
        {
            Nintex.Workflow.Diagnostics.ActivityErrorHandler.HandleFault(executionContext, exception,
                this.WorkflowInstanceId, "Error Reading from Property Bag";, __ListItem.Id, __ListId, __Context);
            return base.HandleFault(executionContext, exception);
        }
ReadFromPropertyBagAdapter.cs
Moving onto the Adapter file now. This class inherits the Nintex.Workflow.Activies.Adapters.GenericRenderingAction and needs to implement 5 overrides. I have also included two private constants strings. These are the property names we declared in the Activity class. Ensure these names match, or you will encounter errors later which takes a while to debug.
using System;
using System.Collections.Generic;
using System.Workflow.ComponentModel;
using Microsoft.SharePoint;
using Nintex.Workflow;
using Nintex.Workflow.Activities.Adapters;

namespace CFSP.CustomActions.ReadFromPropertyBag
{
    public class ReadFromPropertyBagAdapter : GenericRenderingAction
    {
       //Values should match the property names in the ReadFromPropertyBagActivity class.
        private const string PropertyProperty = "Property";
        private const string ResultOutputProperty = "ResultOutput";

       public override NWActionConfig GetDefaultConfig(GetDefaultConfigContext context)
        {
            throw new NotImplementedException();
        }

        public override bool ValidateConfig(ActivityContext context)
        {
            throw new NotImplementedException();
        }
        public override CompositeActivity AddActivityToWorkflow(PublishContext context)
        {
            throw new NotImplementedException();
        }

        public override NWActionConfig GetConfig(RetrieveConfigContext context)
        {
            throw new NotImplementedException();
        }

        public override ActionSummary BuildSummary(ActivityContext context)
        {
            throw new NotImplementedException();
        }
   }
}
I will explain each override before showing you the code.
GetDefaultConfig sections allows you to set up the parameters for user input and outputs. If you wish the user to freely type a value use a PrimitiveValue. If you would like the user to use a predefined value that would be a variable somewhere in the workflow then use NWWorkflowVariable value. Typically the output would always be written back to a Workflow Variable so this will be a Variable type of NWWorkflowVariable. Add an ActivityParameter for each property.
public override NWActionConfig GetDefaultConfig(GetDefaultConfigContext context)
       {
            NWActionConfig config = new NWActionConfig(this);
            //define the number of parameters one for each custom parameter.
            config.Parameters = new ActivityParameter[2];
            //define the parameters that the user can configure for this action.
            config.Parameters[0] = new ActivityParameter();
            config.Parameters[0].Name = PropertyProperty;
            config.Parameters[0].PrimitiveValue = new PrimitiveValue();
            config.Parameters[0].PrimitiveValue.Value = string.Empty;
            config.Parameters[0].PrimitiveValue.ValueType = SPFieldType.Text.ToString();

            config.Parameters[1] = new ActivityParameter();
            config.Parameters[1].Name = ResultOutputProperty;
            config.Parameters[1].Variable = new NWWorkflowVariable();

            //set the default label for the action.
            config.TLabel = ActivityReferenceCollection.FindByAdapter(this).Name;
            return config;
       }
ValidateConfig section allows you to validate the values entered. Here I’m just ensuring the value are not blank. You would add a validation for each input property.
public override bool ValidateConfig(ActivityContext context)
{
            //Add logic to validate the configuration here.
            bool isValid = true;
            Dictionary<string, ActivityParameterHelper> parameters = context.Configuration.GetParameterHelpers();
            if (!parameters[PropertyProperty].Validate(typeof(string), context))
            {
                isValid &= false;
                validationSummary.AddError("Property Bag", ValidationSummaryErrorType.CannotBeBlank);
            }
            return isValid;
}
Validation is shown in image below.

AddActivityToWorkflow creates an instance of the Activity and set its properties based on config. You also bind the default properties. Assign each parameter you have here. Lastly attach the Activity Flags. Then add it all to the parent activity.
public override CompositeActivity AddActivityToWorkflow(PublishContext context)
        {
            Dictionary<string, ActivityParameterHelper> parameters = context.Config.GetParameterHelpers();
            ReadFromPropertyBagActivity activity = new ReadFromPropertyBagActivity();

            parameters[PropertyProperty].AssignTo(activity, ReadFromPropertyBagActivity.PropertyProperty, context);
            parameters[ResultOutputProperty].AssignTo(activity, ReadFromPropertyBagActivity.ResultOutputProperty, context);
            activity.SetBinding(ReadFromPropertyBagActivity.__ContextProperty, new ActivityBind(context.ParentWorkflow.Name, StandardWorkflowDataItems.__context));
            activity.SetBinding(ReadFromPropertyBagActivity.__ListItemProperty, new ActivityBind(context.ParentWorkflow.Name, StandardWorkflowDataItems.__item));

            activity.SetBinding(ReadFromPropertyBagActivity.__ListIdProperty, new ActivityBind(context.ParentWorkflow.Name, StandardWorkflowDataItems.__list));

            ActivityFlags f = new ActivityFlags();
            f.AddLabelsFromConfig(context);
            f.AssignTo(activity);

            context.ParentActivity.Activities.Add(activity);
            return null;
        }
GetConfig reads the properties from the context.Activity and updates the values in the NWActionConfig. Add a new parameter for each property. You can see when we RetrieveValue from our activity, we are grabbing the corresponding DependencyProperty from our activity.
public override NWActionConfig GetConfig(RetrieveConfigContext context)
        {
            //Read the properties from the context.ACtivity and update the values in the NWActionConfig

            NWActionConfig config = this.GetDefaultConfig(context);
            Dictionary<string, ActivityParameterHelper> parameters = config.GetParameterHelpers();
            parameters[PropertyProperty].RetrieveValue(context.Activity, ReadFromPropertyBagActivity.PropertyProperty, context);
            parameters[ResultOutputProperty].RetrieveValue(context.Activity, ReadFromPropertyBagActivity.ResultOutputProperty, context);

            return config;

        }
BuildSummary is the last implemented override method. The code here writes out the summary displayed to the user after that have configured the action and hovered the mouse over the custom action.
public override ActionSummary BuildSummary(ActivityContext context)
        {
           // Construct an ActionSummary class to display details about this action.

            Dictionary<string, ActivityParameterHelper> parameters = context.Configuration.GetParameterHelpers();
            return new ActionSummary("Retrieve the following Property bag: {0}", parameters[PropertyProperty].Value);

        }
BuildSummary is displayed below on mouse hover once item has been configured.

ReadFromPropertyBagDialog.aspx
The code behind for this aspx file inherits from Nintex.Workflow.ServerControls.NintexLayoutsBase. Apart from changing the inheriting type, there is no need to do anything else in the .cs file. In the aspx file we would have the basic structure. This structure contains the link up to your page behind, register all the Nintex controls required, the two main JavaScript functions to read and save the configuration, and lastly the display section of your page.
(Update:Please note to get this working for SharePoint 2013, please make sure ~/_layouts/NintexWorkflow is replaced with ~/layouts/15/NintextWorkflow)
<%@ Assembly Name="$SharePoint.Project.AssemblyFullName$" %>;
<%@ Page Language="C#" DynamicMasterPageFile="~masterurl/default.master" AutoEventWireup="true"; CodeBehind="ReadFromPropertyBagDialog.aspx.cs" EnableEventValidation="false"

    Inherits="CFSP.CustomActions.ReadFromPropertyBag.ReadFromPropertyBagDialog" %>
<%@ Register TagPrefix="Nintex" Namespace="Nintex.Workflow.ServerControls" Assembly="Nintex.Workflow.ServerControls, Version=1.0.0.0, Culture=neutral, PublicKeyToken=913f6bae0ca5ae12" %>;

<%@ Register TagPrefix="Nintex" TagName="ConfigurationPropertySection" src="~/_layouts/NintexWorkflow/ConfigurationPropertySection.ascx" %>

<%@ Register TagPrefix="Nintex" TagName="ConfigurationProperty" src="~/_layouts/NintexWorkflow/ConfigurationProperty.ascx&" %>;

<%@ Register TagPrefix="Nintex" TagName="DialogLoad" Src="~/_layouts/NintexWorkflow/DialogLoad.ascx" %>

<%@ Register TagPrefix="Nintex" TagName="DialogBody" Src="~/_layouts/NintexWorkflow/DialogBody.ascx" %>;

<%@ Register TagPrefix="Nintex" TagName="SingleLineInput" Src="~/_layouts/NintexWorkflow/SingleLineInput.ascx" %>

<%@ Register TagPrefix="Nintex" TagName="PlainTextWebControl" Src="~/_layouts/NintexWorkflow/PlainTextWebControl.ascx" %>

<asp:Content ID="ContentHead" ContentPlaceHolderID="PlaceHolderAdditionalPageHead" runat="server">

    <Nintex:DialogLoad runat="server" />
    <script type="text/javascript" language="javascript">
        function TPARetrieveConfig() {
       //To Do
        }

        function TPAWriteConfig() {
        //To Do
        }

        onLoadFunctions[onLoadFunctions.length] = function () {
            dialogSectionsArray["<%= MainControls1.ClientID >"] = true;
        };
    </script>
</asp:Content>

<asp:Content ID="ContentBody" ContentPlaceHolderID="PlaceHolderMain" runat="Server">
  <Nintex:ConfigurationPropertySection runat="server" Id="MainControls1">
             <TemplateRowsArea>
                   <!--ToDo-->
              </TemplateRowsArea>
 </Nintex:ConfigurationPropertySection>

  <Nintex:DialogBody runat="server" id="DialogBody">
  </Nintex:DialogBody>
</asp:Content>
First section we will fill in will be the Nintex:ConfigurationPropertySection within the ContentPlaceHolderID PlaceHolderMain. In here we need to create a Nintex:ConfigurationProperty for each configuration property. In our case here that will be the Property Bag Name and the Result. You can see from below for consistency I have given the ID of the controls the same name as the Dependency Properties. Also note that the output because I’m want the user to assign the results to a workflow property, I’m using the Nintex:VariableSelector control.
            <Nintex:ConfigurationProperty runat="server" FieldTitle="Property Bag Property" RequiredField="True">
 <TemplateControlArea>
 <Nintex:SingleLineInput clearFieldOnInsert="true" filter="number" runat="server" id="propertyProperty"></Nintex:SingleLineInput>
 </TemplateControlArea>
 </Nintex:ConfigurationProperty>
 <Nintex:ConfigurationProperty runat="server" FieldTitle="Result Output" RequiredField="False">
 <TemplateControlArea>
 <Nintex:VariableSelector id="resultOutput" runat="server" IncludeTextVars="True"></Nintex:VariableSelector>
 </TemplateControlArea>

 </Nintex:ConfigurationProperty>
Next we are going to look at the two JavaScript files. When the dialog page is rendered and saved it passed an XML file, known as the configXml. We need to read out and read into the XML file using XPath. Please note when you come to deploying, if you find that your dialog control loads, however the ribbon bar is disabled at the top of the dialog, it is most likely that you have an error in the JavaScript. This took me a while to diagnose, but now I know what causes the issue, it allowed me to fix it straight away.

From the TPARetrieveConfig code the [@Name=’ ‘] will always be the public property name you gave it in the ReadFromPropertyBagActivity.cs file. As you can see from the code below there is a different way to obtain the value depending if the configuration property is a PrimitiveValue or a WorkflowVariable. This you defined in the GetDefaultConfig() method within the ReadFromPropertyBagAdapter.cs file. Lastly if you are still having problems getting the value, ensure your XPath is correct by debugging the Javascript and viewing the configXML variable.
 function TPARetrieveConfig() {
 setRTEValue('<%=propertyProperty.ClientID%>', configXml.selectSingleNode("/NWActionConfig/Parameters/Parameter[@Name='Property']/PrimitiveValue/@Value").text);

 document.getElementById('<%=resultOutput.ClientID%>').value = configXml.selectSingleNode("/NWActionConfig/Parameters/Parameter[@Name='ResultOutput']/Variable/@Name").text;

 }
From the TPAWriteConfig code it is basically doing the opposite of TPARetrieveConfig, just it checks the dropdown control (resultOutput) that a value has been selected before saving.
 function TPAWriteConfig() {
 configXml.selectSingleNode("/NWActionConfig/Parameters/Parameter[@Name='Property']/PrimitiveValue/@Value").text = getRTEValue('<%=propertyProperty.ClientID%>');

 var resultOuputCtrl = document.getElementById('<%=resultOutput.ClientID%>');

 if (resultOuputCtrl.value.length > 0) {
 configXml.selectSingleNode("/NWActionConfig/Parameters/Parameter[@Name='ResultOutput']/Variable/@Name").text = resultOuputCtrl.value;
 }

 return true;
 }
ReadFromPropertyBagAction.nwa
The NWA file as stated previously is just an XML file. This file is used by the Feature Receiver to register the custom action within SharePoint WebApplication.
Add an Elements file to the project and name it NWAFile. Add an XML file and name it ReadFromPropertyBagAction.nwa. From the properties window (press F4) we need to change the build action from None to Content, change the deployment type to ElementFile and remove the Path “\NWAFile”.

From within the XML file, remove all text and then place the following in.
(Update for SharePoint 2013 don’t forget Layouts is now /_layouts/15/)
<NintexWorkflowActivity>
 <Name>Retrieve from Property Bag</Name>
 <Category>CannonFodder Category</Category>
 <Description>A custom action to retrieve a property from the SharePoint Web Property Bag.</Description>
 <ActivityType>CFSP.CustomActions.ReadFromPropertyBag.ReadFromPropertyBagActivity</ActivityType>
 <ActivityAssembly>$SharePoint.Project.AssemblyFullName$</ActivityAssembly>
 <AdapterType>CFSP.CustomActions.ReadFromPropertyBag.ReadFromPropertyBagAdapter</AdapterType>
 <AdapterAssembly>$SharePoint.Project.AssemblyFullName$</AdapterAssembly>
 <HandlerUrl>ActivityServer.ashx</HandlerUrl>
 <Icon>/_layouts/NintexWorkflow/CustomActions/ReadFromPropertyBag/Images/ReadFromPropertyBagIcon49x49.png</Icon>
 <ToolboxIcon>/_layouts/NintexWorkflow/CustomActions/ReadFromPropertyBag/Images/ReadFromPropertyBagIconSmall30x30.png</ToolboxIcon>
 <ConfigurationDialogUrl>CustomActions/ReadFromPropertyBag/ReadFromPropertyBagDialog.aspx</ConfigurationDialogUrl>
 <ShowInCommonActions>yes</ShowInCommonActions>
 <DocumentLibrariesOnly>no</DocumentLibrariesOnly>
</NintexWorkflowActivity>
Let me explain each line to you.
Lastly add the NWA file to the Web Application Feature.
Getting the Token $SharePoint.Project.AssemblyFullName$ to replace on a build.
At this point, save and close your solution. Now open up your .csproj file in Notepad or Notepad++. At the bottom of your first <PropertyGroup> section add the following XML. Save the file and re-open your solution in Visual Studio.
<TokenReplacementFileExtensions>nwa</TokenReplacementFileExtensions>

When you build your solution, Visual Studio will replace your token with the actual Full Assembly Name. More information about TokenReplacementFileExtensions.
WebApplication – Custom Action EventReceiver.cs
The Feature Event receiver is the final piece to our custom action. This will deploy or remove our custom action and make it available to the Web Application by modifying the Web.Config and registering the Action with Nintex within the farm. To add the custom action we use the nwa file. To remove it we need to know the namespace of the adapter, and assembly name. As you build more custom actions you can reuse this feature and just de-activate and re-activate each time you deploy a new custom action.
using System;
using System.Collections.ObjectModel;
using System.IO;
using System.Runtime.InteropServices;
using System.Xml;
using Microsoft.SharePoint;
using Microsoft.SharePoint.Administration;
using Nintex.Workflow;
using Nintex.Workflow.Administration;
using Nintex.Workflow.Common;
using System.Reflection;
namespace CFSP.CustomActions.Features.WebApplication___Custom_Actions
{
[Guid(&quot;07607091-449b-422b-94e4-84e6d863eb9e&quot;)]
public class WebApplication___Custom_ActionsEventReceiver : SPFeatureReceiver
{
public override void FeatureActivated(SPFeatureReceiverProperties properties)
{
SPWebApplication parent = (SPWebApplication) properties.Feature.Parent;
AddCustomAction(parent, properties, "ReadFromPropertyBagAction.nwa");
//Add additional Custom Actions nwa files here.
}
public override void FeatureDeactivating(SPFeatureReceiverProperties properties)
{
SPWebApplication parent = (SPWebApplication) properties.Feature.Parent;
RemoveCustomAction(parent, properties,
"CFSP.CustomActions.ReadFromPropertyBag.ReadFromPropertyBagAdapter",
Assembly.GetExecutingAssembly().FullName);
//Remove additional Custom Actions here.
}
protected void AddCustomAction(SPWebApplication parent, SPFeatureReceiverProperties properties,
string pathToNWAFile)
{
// First step is register the action to the Nintex Workflow database
XmlDocument nwaXml = GetNWADefinition(properties, pathToNWAFile);
ActivityReference newActivityReference = ActivityReference.ReadFromNWA(nwaXml);
ActivityReference action = ActivityReferenceCollection.FindByAdapter(newActivityReference.AdapterType,
newActivityReference.AdapterAssembly);
if (action != null)
{
// update the details if the adapter already exists
ActivityReferenceCollection.UpdateActivity(action.ActivityId, newActivityReference.Name,
newActivityReference.Description, newActivityReference.Category,
newActivityReference.ActivityAssembly, newActivityReference.ActivityType,
newActivityReference.AdapterAssembly, newActivityReference.AdapterType,
newActivityReference.HandlerUrl, newActivityReference.ConfigPage,
newActivityReference.RenderBehaviour, newActivityReference.Icon, newActivityReference.ToolboxIcon,
newActivityReference.WarningIcon, newActivityReference.QuickAccess,
newActivityReference.ListTypeFilter);
}
else
{
ActivityReferenceCollection.AddActivity(newActivityReference.Name, newActivityReference.Description,
newActivityReference.Category, newActivityReference.ActivityAssembly,
newActivityReference.ActivityType, newActivityReference.AdapterAssembly,
newActivityReference.AdapterType, newActivityReference.HandlerUrl, newActivityReference.ConfigPage,
newActivityReference.RenderBehaviour, newActivityReference.Icon, newActivityReference.ToolboxIcon,
newActivityReference.WarningIcon, newActivityReference.QuickAccess,
newActivityReference.ListTypeFilter);
action = ActivityReferenceCollection.FindByAdapter(newActivityReference.AdapterType,
newActivityReference.AdapterAssembly);
}
// Second step is to modify the web.config file to allow use of the activity in declarative workflows
string activityTypeName = string.Empty;
string activityNamespace = string.Empty;
Utility.ExtractNamespaceAndClassName(action.ActivityType, out activityTypeName, out activityNamespace);
AuthorisedTypes.InstallAuthorizedWorkflowTypes(parent, action.ActivityAssembly, activityNamespace,
activityTypeName);
// Third step is to activate the action for the farm
ActivityActivationReference reference = new ActivityActivationReference(action.ActivityId, Guid.Empty,
Guid.Empty);
reference.AddOrUpdateActivationReference();
}
protected void RemoveCustomAction(SPWebApplication parent, SPFeatureReceiverProperties properties,
string adapterType, string adapterAssembly)
{
ActivityReference action = ActivityReferenceCollection.FindByAdapter(adapterType, adapterAssembly);
if (action != null)
{
// Remove the action definition from the workflow configuration database if the Feature is not activated elsewhere
if (!IsFeatureActivatedInAnyWebApp(parent, properties.Definition.Id))
ActivityReferenceCollection.RemoveAction(action.ActivityId);
string activityTypeName = string.Empty;
string activityNamespace = string.Empty;
Utility.ExtractNamespaceAndClassName(action.ActivityType, out activityTypeName, out activityNamespace);
// Remove the web.config entry
Collection<SPWebConfigModification> modifications = parent.WebConfigModifications;
foreach (SPWebConfigModification modification in modifications)
{
if (modification.Owner == AuthorisedTypes.OWNER_TOKEN)
// OWNER_TOKEN is the owner for any web config modification added by Nintex Workflow
{
if (IsAuthorizedTypeMatch(modification.Value, action.ActivityAssembly, activityTypeName,
activityNamespace))
{
modifications.Remove(modification);
parent.Farm.Services.GetValue<SPWebService>().ApplyWebConfigModifications();
break;
}
}
}
}
}
private bool IsAuthorizedTypeMatch(string modification, string activityAssembly, string activityType,
string activityNamespace)
{
XmlDocument doc = new XmlDocument();
doc.LoadXml(modification);
if (doc.FirstChild.Name == "authorizedType")
{
return (doc.SelectSingleNode("//@TypeName").Value == activityType
&& doc.SelectSingleNode("//@Namespace").Value == activityNamespace
&& doc.SelectSingleNode("//@Assembly").Value == activityAssembly);
}
return false;
}
private bool IsFeatureActivatedInAnyWebApp(SPWebApplication thisWebApplication, Guid thisFeatureId)
{
SPWebService webService = SPWebService.ContentService;
if (webService == null)
throw new ApplicationException("Cannot access ContentService");
SPWebApplicationCollection webApps = webService.WebApplications;
foreach (SPWebApplication webApp in webApps)
{
if (webApp != thisWebApplication)
if (webApp.Features[thisFeatureId] != null)
return true;
}
return false;
}
private XmlDocument GetNWADefinition(SPFeatureReceiverProperties properties, string pathToNWAFile)
{
using (Stream stream = properties.Definition.GetFile(pathToNWAFile))
{
XmlDocument nwaXml = new XmlDocument();
nwaXml.Load(stream);
return nwaXml;
}
}
}
}
Deploying and checking everything has worked.
If you have done everything correctly, at the point go ahead and deploy your solution. Ensure your feature has been activated for a given web application. Then open Central Admin. Under the Nintex Workflow Management section select Manage allowed actions.

In Manage Allowed action you should see your Action, and that it is ticked. Meaning it is allowed to be used.

Let us go to our site now, and create a new Nintex Workflow for our custom list. My list has a Single line of text called Title and another one called PropertyValue. In the toolbar panel of my Nintex Workflow, I can now see my CannonFodder Category, and my custom action.

Drag this onto your page. If you find it doesn’t stick to your workflow page, go back and check your nwa file that all your Types and Assemblies match up correctly. Once it is on your page, configure this custom action. Your dialog will be presented to you.
Assign the Property Bag Property to the Item Property Title.
Create a new Workflow Variable and name this PBResult. Then assign Result Output to PBResult. Click Save on the dialog.

Under Libraries and List find the action Set field value and drag this onto the form underneath our custom action. Then configure it so that it sets our column PropertyValue to Workflow Data called PBResult that we created in the last step. Click Save on the dialog. 
Lastly before we test this out, on the ribbon bar of the workflow page, under the Nintex Workflow 2010 tab, click Workflow Settings. Configure it so that it Starts when items are created.

Save and Publish the workflow.
Testing
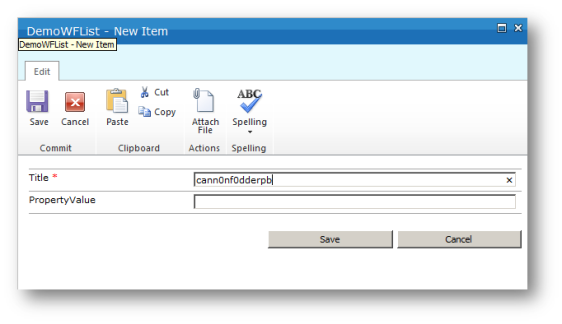
I already have a value in my property bag called cann0nf0dderpb. So I’m going to create a new item in my list, and set the title to cann0nf0dderpb and save the form.
After a moment or two the workflow has kicked in. Once I refresh my list I can see that in PropertyValue, the value of my PropertyBag item is displayed. I purposely made the property bag value say ‘Nintex Workflow Worked’.

As I stated right at the start, there is a lot of files that need to be in place to plumb everything together, and it’s only the small Execute function that does the actual work. For further reading, please download the Nintex SDK
You can download this project directly from my OneDrive. – 2010
You can download this project directly from my OneDrive – 2013


